Manage Azure AD using PowerShell

Welcome to another blog of mine, Managing Azure AD using PowerShell
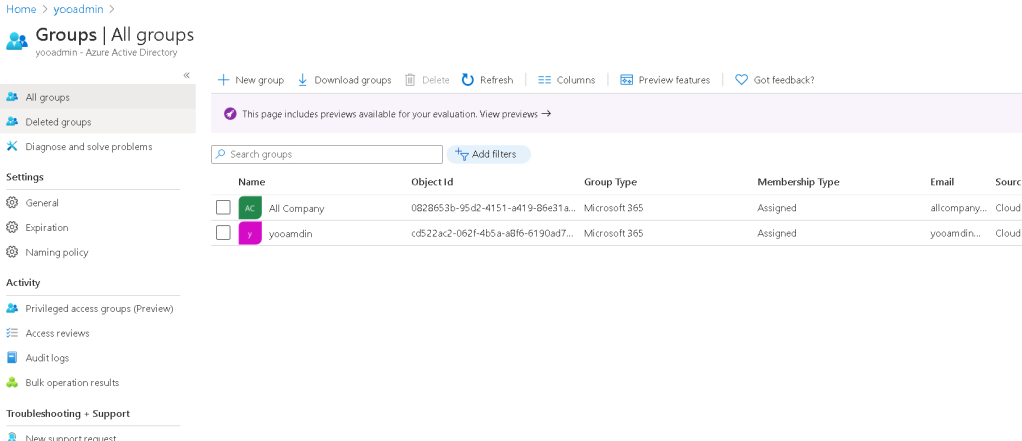
One could ask why go through all the pain of scripting stuffs in PowerShell when there is a pretty nice Portal Console like this below.

Azure Portal

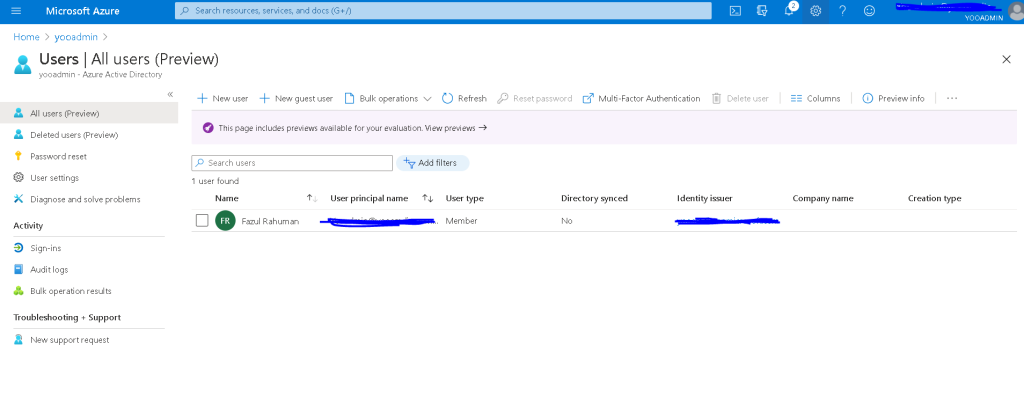
I would agree with the most of them saying portal is enough but PowerShell comes in handy when it comes bulk deployment or anything that needs to be done more than ones or repeatedly.

For instance let say there are 20 New Users joining your Organization. You got 10 mins to do onboard these user to Azure AD – you would probably look at me like No way, you’re dreaming. That’s when I will tell you this “Ohh you should use PowerShell instead ;)”

That’s one of the many examples that came in my mind. Now you probably have agreed with me and be like ok Show me the PowerShell way of doing this quickly then.

Its Pretty Simple if you see the below script to Install, Import and connect to Azure AD.

Install-Module msonline -scope currentuser -force -confirm:$false

The above command is what you might run first to install the Azure PowerShell Module in you machine. (Keep in mind this requires Admin Privileges so run you PowerShell as Admin.)

Once you have installed the Module next on the list is to Import it.

Import-Module msonline
Result from the Script

This is what it would look like once imported. How do you check if the module is imported? Well let me show you, Run this simple command and you should be able to see.

Checking if module is imported

Now we have installed and imported the module next would be connecting to the MsolService (Microsoft Online Service)

connect-msolservice

Once you enter the above command you will be asked to enter you Creds, shown below:

Portal login window

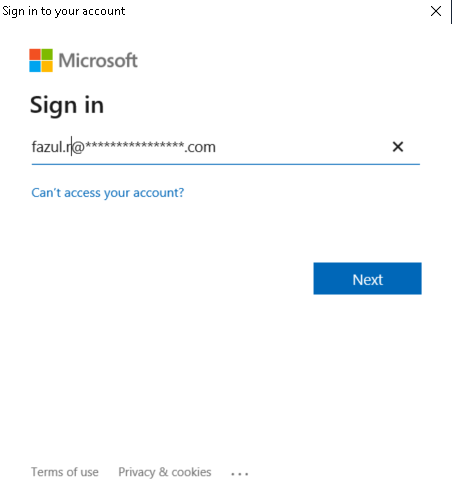
Once you logged in successfully now you are all set to go and do some cool PowerShell script.

As for my example above lets say you are going to create users in Azure AD, let’s create the user now I am going to onboard Elon Musk as my first staff :P, Lets see the script for that.

New-MsolUser -UserPrincipalName "User UPN" -DisplayName "Elon Musk (Tesla)" -FirstName "Elon" -LastName "Musk"

You need to add your Domain name in the UserPrincipalName property and a Random generated Password would be added to the user account. Let see the result so the above script

Elon Musk On-boarded

Tadaaa… Successfully onboarded Elon Musk. By Default it show that created user has license of not. Lets verify in the portal to see if he is there?

Elon Musk in added successfully

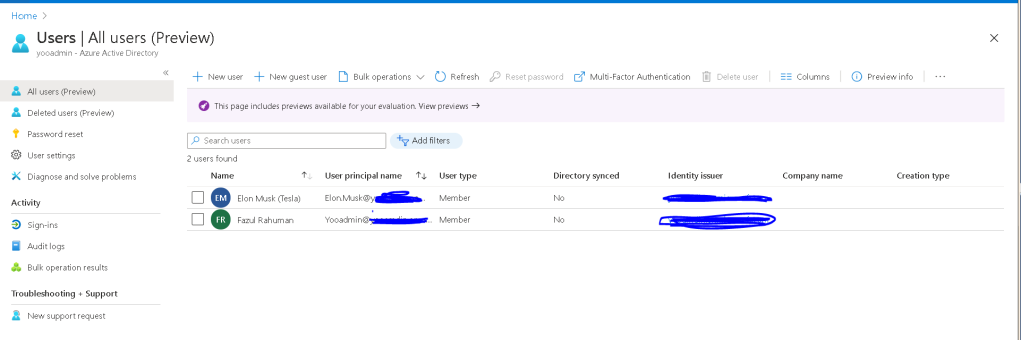
It’s that easy to create a user using PowerShell now lets create a Group as well and call it “Technical Team” Currently I only have 2 groups.

group console in azure portal

Script is so simple to create a group in Azure AD, Let run the command see the result below.

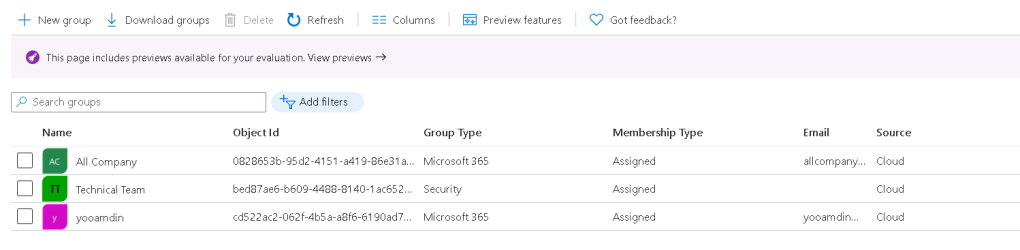
New-MsolGroup -DisplayName "Technical Team" 
Group created in Azure AD using powershell

let check in portal now. BOOOOM here you go!

Security Group in Azure AD

Creating users and groups are so simple and easy to do it via PowerShell.
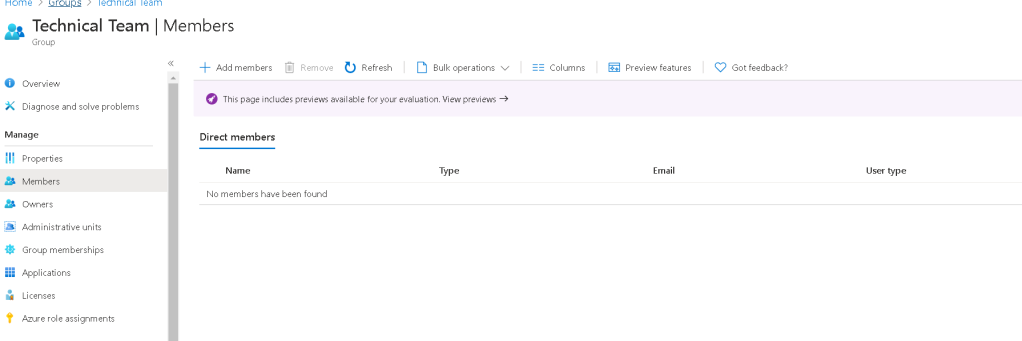
Now Lets add all the Accounts in the tenant to the Technical Team Group, A simple foreach loop should do the job for us.

Current state of the technical team group – No users

let run the Foreach loop.

foreach($user in (Get-MsolUser)){
$ObjectId = Get-MsolUser -UserPrincipalName $user.userprincipalname | Select-Object objectid
Add-MsolGroupMember -GroupObjectId "bed87ae6-b609-4488-8140-1ac652b2d8ed" -GroupMemberType User -GroupMemberObjectId $ObjectId.ObjectId
}

Let check the console to see if the Users are added?

users added

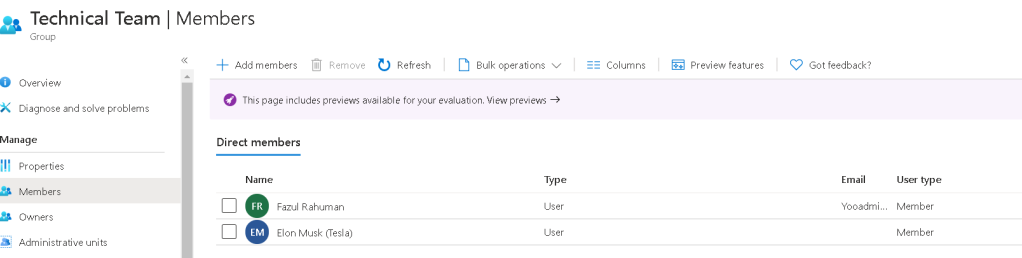
Now We have created a user & security group in Azure AD and added the users to the security group now lets add a DeveloperPack_E5 license to Elon Musk so he can start working.

Lets check the current license status for Elon and add him a license.

 Get-MsolUser -UserPrincipalName "user UPN"| select userprincipalname,displayname,licenses
Current License state for a User

Lets add the license now.

Set-MsolUserLicense -userprincipalname "User UPN" -AddLicenses "yooadmin:DeveloperPack_e5"

let see the result in the PowerShell and also in the Azure Portal.
In Powershell you can also search via the display name as shown below.

Powershell Checking License for the user
Result from Azure Console.

It’s that simple to manage Azure AD using Powershell.

Conclusion: If you are managing azure Ad via Powershell its going to be great as you can do a lot of automation such as User Onboarding process, License assign based on ad group assignment, disabled users who left the organization, get license count update and many more.

Will be doing lots of Azure Powershell based resource creation.

Object Oriented Programming Classes and Objects In PowerShell

Of-course Powershell is OOP(Object oriented programming Tool). Which means any developer who know Object oriented Programming would know how to utilize it, that doesn’t mean who are not developers cannot learn Powershell. it’s bit annoying to understand the concepts of the OOP to take maximum use of it.

Classes aka Blueprints

Talking of concept of Classes Lets look at the inheritance in Powershell. How to write a script that will allow us to achieve the Inheritance from a class. Below diagram will show what does Inheritance look like.

There is a Class called Wallet which will basically have the certain base attributes such as Brand, Name of the Wallet, How many cards you can hold, how much money you can keep in it. These attributes are called as variables in the powershell class and the there are functions that a wallet can do, Such as: Spending function.

These are the 2 major characteristics of the Class.
Attributes
Functions

Inheritance

You can see from the below Powershell script that i have created a Class called Wallet. with some attribute and function that a wallet will have. In Powershell Attributes of a class is represented as Variables($brand,$name and etc) and Functions are represented as functions (SpendCash).

class Wallet{
    [string] $Brand
    [string] $Name
    [string] $Card1
    [float] $Card1Bal
    [string] $Card2
    [float] $Card2Bal
    [string] $CashonHand
    [string] $License

    [void] SpendCash ([float]$spent){
        $this.CashonHand -= $spent
    }
}

$fazulwallet = New-Object Wallet

$fazulwallet.Name='Fazul Rahuman'
$fazulwallet.Brand = "LV"
$fazulwallet.Card1 = 'ABC Bank'
$fazulwallet.Card1Bal = 4000
$fazulwallet.Card2 = 'XYZ Bank'
$fazulwallet.Card2Bal = 1500
$fazulwallet.CashonHand = 500 
$fazulwallet.License = "ABCED12341EWE2231"

$fazulwallet.SpendCash(100)

The class by itself doesn’t create the inheritance concept. Until you create a object from that class. $fazulwallet = New-Object Wallet once you create an Object. You now can use those attributes and function in your own object without defining anything, show below.

Creating object

Now all you need to do it feed the data into the object like below. you can now as many wallets as you want and feed data into it.

Feeding data to the object

We saw how the attributes work now lets look the functions, i created a function called SpendCash if you can see above image which shows i have 500 Cashonhand, Now i will use the function SpendCash to send a 100 from the cash i have in my wallet.

calling function

Now i have spent 100 form the cash i had in my wallet by simply running the function called SpendCash. Interesting isn’t it.

The purpose of the Class implementation in Powershell is to create runtime objects which could hold different values but use the same Class to instance an object. This Concept is also used in DSC resources.

Scraping Amazon.co.uk using Powershell

Helloo! I was asked by one of my colleague whether i can create a Web scrape tool in Powershell like its in Python using BeautifulSoup. I told him you don’t be needing any more extra modules to be added into to Powershell to scrape a website for data. Obviously i use Python as much as Powershell too.

The Beauty of the Powershell is that you don’t need additional tools(Python) or modules(BeautifulSoup) to be installed rather you can use this Command which is inbuilt in Powershell “Invoke-Webrequest“. believe me its so powerful – now wonder why its called PowerShell 😛

Using a bit of Source code checks from the https://www.amazon.co.uk site using the Inspect Element i was able to create a script that basically pulls all the necessary information of the products that’s in a specific search criteria value. Present it out as a Table where you can basically see all the details where you can build a database of products if you ran it every few hours and feed the data into the Database for data-mining.

The Challenge of doing is that the Amazon Page is so dynamic in presenting the products where they even change HTML codes structure for even product wise. which was a fun weekend project to create the web-scraper.

Since i haven’t seen anyone paying much importance to the Powershell’s inbuilt tools like invoke-webrequest command. i decided to share this fun weekend project with you all. It took just less than 1 hour to fully program this 41 lines of code.

Let me show you the the result this time before going to the script.

in the above report you can see the following details that’s been pulled from the Amazon using Powershell:
1, Name
2, Link
3, Price
4, Delivery
5, Rating

Using these fields you can create your own Product data repository for further invest or if you are planning to do a start-up if you can think of a potential way.

Lets reveal the fun part the Script.

$Search = "camera"
$BaseURL = "https://www.amazon.co.uk"
$SearchLink = "https://www.amazon.co.uk/s?k=$Search&ref=nb_sb_noss_2"
$result = @()

$Response = Invoke-WebRequest -Uri $SearchLink
$productNames=$Response.AllElements | where {$_.class -eq "a-link-normal a-text-normal"} | select outertext,href # Product
$images = $Response.AllElements | where {$_.Class -eq "s-image"} | select src
$prices= $Response.AllElements | where {$_.class -eq "a-price-whole"} | select outertext # Price
$cents = $Response.AllElements | where {$_.class -eq "a-price-fraction"} | select outertext # Price cents
$deliveries = $Response.AllElements | where {$_.class -eq "a-row a-size-base a-color-secondary s-align-children-center"} | select outertext # Delivery
$ratings = $Response.AllElements | where {$_.class -eq "a-row a-size-small"} | select outertext # Rating

$count = $productNames.Count 

For ($i=0;$i -le $count; $i++){

    $Details = New-Object -TypeName psobject -Property @{
    
    Name = $productNames[$i].outertext
    Link = $BaseURL+$productNames[$i].href
    Price = $prices[$i].Outertext+$cents[$i].outertext
    Image = $images[$i].src
    Rating = $ratings[$i].Outertext
    Delivery = $deliveries[$i].Outertext
    }
    
    $result += $Details | Select-Object Name,Link,price,image,rating,Delivery
}

   $Style = @"
<style>
BODY{font-family:Calibri;font-size:10pt;}
TABLE{border-width: 1px;border-style: solid;border-color: black;border-collapse: collapse; padding-right:5px}
TH{border-width: 1px;padding: 5px;border-style: solid;border-color: black;color:black;background-color:#FFFFFF }
TH{border-width: 1px;padding: 5px;border-style: solid;border-color: black;background-color:green}
TD{border-width: 1px;padding: 5px;border-style: solid;border-color: black}
</style>
"@

$result | select name,Link,Price,Delivery,rating | Sort-Object Price | ConvertTo-Html -Head $Style -Body "<H2>Amazon Product result for $Search</H2>" |Out-File 'C:\temp\Report.html' 

I was looking for Camera as a example you can obviously go with any product you would like to search.. the best thing is you get a report in less than 12 seconds. you can see below highlighted.

You might need a bit of HMTL Understanding to modify the script but its not that hard and never late to learn, Like i say its all about learning. Happy Scarping 🙂

Note: Be-caution on using this script for any other purpose/sites as this demonstration is only for educational purpose and to show the potential of Powershell apart of the System management in an organization.

Password Expire Report – Powershell

Hello! welcome to another interesting task i was working on couple of days ago. To give a bit of background of what exactly i was doing.

Part of My Domain to Domain Migration (AKA ADMT Migration) project i was asked to generate a report which basically pulls all of users from the source domain and check the password to check how many users have password expiring sooner. It was a fun task to do, i just added bit of a HTML touch to make it look like an actual report, (Management loves those reports).

Report shows password that expires in a day,10 and 20 days. You get 3 reports also you can modify the script to match your needs.

Less talking and to the point, Script. Please change the below script for your environment.

$useridentified = Get-ADUser -Filter {((enabled -eq $true) } -SearchBase "OU=OUName,DC=domainname,DC=domainname" -Properties givenname,surname,samaccountname,mail,PasswordLastSet | select givenname,surname,samaccountname,mail,PasswordLastSet
$userforpasswordcheck = @()
$Reportforpassword = @()
$10days = @()
$20days = @()
$1day = @()

foreach($Suser in $useridentified){

$userforpasswordcheck += Get-ADUser $Suser.SamAccountName -Properties givenname,surname,samaccountname,mail,PasswordLastSet -Server Servername | select givenname,surname,samaccountname,mail,PasswordLastSet

}

foreach($SingleUser in $userforpasswordcheck){
try{
$NextReset = $SingleUser.PasswordLastSet.AddDays(60)
}catch{
}

   $Passwordreport = New-Object -TypeName psobject -Property @{
    "Firstname" = $SingleUser.givenname
    "Lastname" = $SingleUser.surname
    "Username" = $SingleUser.samaccountname
    "Email" = $SingleUser.mail
    "PasswordLastReseton" = ($SingleUser.PasswordLastSet).Date
    "Expiry" = $NextReset 
    "Daysremaining" = ($NextReset - (Get-Date)).Days
   }

      $Reportforpassword += $PasswordReport | Select-Object  "Firstname","Lastname","Username","Email","PasswordLastReseton","Expiry","Daysremaining"
}

foreach($line in $Reportforpassword){
    if(($line.Daysremaining -eq 1) -or $line.Daysremaining -lt 1){
        $1day += $line
    }elseif($line.Daysremaining -lt 10){
        $10days += $line
    }elseif($line.Daysremaining -lt 20){
        $20days += $line
    }
}

   $Style = @"
<style>
BODY{font-family:Calibri;font-size:10pt;}
TABLE{border-width: 1px;border-style: solid;border-color: black;border-collapse: collapse; padding-right:5px}
TH{border-width: 1px;padding: 5px;border-style: solid;border-color: black;color:black;background-color:#FFFFFF }
TH{border-width: 1px;padding: 5px;border-style: solid;border-color: black;background-color:orange}
TD{border-width: 1px;padding: 5px;border-style: solid;border-color: black}
</style>
"@

$reportpath = 'C:\PasswordEmails\HTML\today.html'

$20days | Select-Object "Firstname","Lastname","Username","Email","PasswordLastReseton","Expiry","Daysremaining" | Sort-Object Daysremaining | ConvertTo-Html -body "<H2> Users Password Check less than 20 days</H2>"-Head $style | Out-File 'C:\PasswordEmails\HTML\20days.html'

$10days | Select-Object "Firstname","Lastname","Username","Email","PasswordLastReseton","Expiry","Daysremaining" | Sort-Object Daysremaining | ConvertTo-Html -body "<H2>Users Password Check less than 10 days</H2>"-Head $style | Out-File 'C:\PasswordEmails\HTML\10days.html'

$1day | Select-Object "Firstname","Lastname","Username","Email","PasswordLastReseton","Expiry","Daysremaining" | Sort-Object Daysremaining | ConvertTo-Html -body "<H2>Users Password Check less than 1 days</H2>"-Head $style | Out-File 'C:\PasswordEmails\HTML\1day.html'

#$Reportforpassword | Select-Object "Firstname","Lastname","Username","Email","PasswordLastReseton","Expiry","Daysremaining" | Sort-Object Daysremaining | ConvertTo-Html -body "<H2>Users Password Check</H2>"-Head $style | Out-File $reportpath

Report will look like as below. Obviously i have to blur the fields. (you know why :P)

Have a nice day!

Project – CITRIX + SCCM + Powershell = PowerScCitrix

Hellooo! The Last couple of days i was busy with some Citrix 7.x + SCCM + Powershell integration for the support teams to quickly work on persistent VDIs which has SCCM Client installed for patching purpose, To be Honest it was amazing to create this Powershell based Application which is very light and powerful.

Applications Abilities are as below:
Citrix Director – Search Sessions user based or Machine based, Poweron, Poweroff and Restart.
SCCM – Deploy SCCM Client (Clearly you can say SCCM server can do it dude whats the need for your Application) – Agreed! But this will look for why SCCM Agent is not installing and will apply pre-defined solutions and get the Agent install – which in my perspective is a key element. Some of the stuff it will look for are – C drive space check, WMI Repository check, Network & firewall check and Connectivity check.

Best about this application is, its fully created in Powershell and can run from Standard Windows desktop in your Corporate environment. PS version should be 4 or above along with appropriate access in you domain.

Here you go the PowerScCitrix!

The project is completed. As you can see i have added additional feature that could help the SCCM Client to be installed on any given environment.

As i get more request of scripts to be created from the teams i work with, I will expand this tool with additional functions to accommodate to help the support teams in managing the Environment.

Indeed Powershell is Great Tool for automation.

Get/Set Out of Office

Getting/Setting OOO (Out of Office) emails are mostly happening with Leavers who left the company on short notice or being kicked out of the Company. Where the account needs to be receiving emails but the other users should be informed about the User that has left the organization and future mails to the mentioned email. The below scripts will show you how to get and set OOO.

Get-Mailbox "User's Email address"| Get-MailboxAutoReplyConfiguration | Select AutoReplyState, InternalMessage

Set Out of Office is pretty straight forward and can you massively if you want to set for a set of mailboxes.

Set-MailboxAutoReplyConfiguration -Identity "user name"-AutoReplyState Enabled -InternalMessage "Out of office mails for Internal staffs" -ExternalMessage "Out of Office mail for anyone Outside the Organization."

Adding Credentials to Powershell Script

Most of the script will require you to add the credentials to it to run with elevated privileges, The below is one of the way you can add credentials to the script.

$usr = "Domain\username"
$Pwd = ConvertTo-SecureString -String "Password" -AsPlainText -Force
$cred = New-Object -TypeName System.Management.Automation.PSCredential -ArgumentList $usr,$pwd

You can now use the Variable for the scripts you use.

Find Disabled users in a AD group

AD Group housekeeping is great way to maintain the access and also to clean up license if you are provisioning users license via AD group, There is a quick and easy way.

Below script will help you

$users = get-adgroupmember -identity "Group name" | select samaccountname

Foreach($user in $users){
    Get-ADuser $user.samaccountname | select samaccountname,enabled
}

Get Mailbox Details

Getting mailbox details are a mundane task for admins. The below script will provide you with general mailbox details that may required

UserID, UserAlias, UserDisplayName, UserType, UserUPN ,UserEmail (Only Primary SMTP) and Mailbox Size.

$CurrentDate = Get-Date
$CurrentDate = $CurrentDate.ToString('dd-MM-yyyy_HH-mm-ss')

$report = @()
$i = 0

$Mailboxes = Get-mailbox -ResultSize Unlimited | Select-Object Identity, Alias, DisplayName, RecipientTypeDetails, UserPrincipalName, PrimarySmtpAddress

Foreach ($Mailbox in $Mailboxes)
{
   $UserID = $Mailbox.Identity
   $UserAlias = $Mailbox.Alias
   $UserDisplayName = $Mailbox.DisplayName
   $UserType = $Mailbox.RecipientTypeDetails
   $UserUPN = $Mailbox.UserPrincipalName
   $UserEmail = $Mailbox.PrimarySmtpAddress

   Write-Host "Email: "$UserEmail

   $MailboxStat = Get-MailboxStatistics -Identity $UserEmail | Select-Object TotalItemsize

   $MailboxSize = $MailboxStat.TotalItemsize


   $userObj = New-Object PSObject
   $userObj | Add-Member NoteProperty -Name "Identity" -Value $UserID
   $userObj | Add-Member NoteProperty -Name "Alias" -Value $UserAlias
   $userObj | Add-Member NoteProperty -Name "DisplayName" -Value $UserDisplayName
   $userObj | Add-Member NoteProperty -Name "RecipientTypeDetails" -Value $UserType
   $userObj | Add-Member NoteProperty -Name "UserPrincipalName" -Value $UserUPN
   $userObj | Add-Member NoteProperty -Name "WindowsEmailAddress" -Value $UserEmail
   $userObj | Add-Member NoteProperty -Name "Mailbox Size" -Value $MailboxSize

   $report = $report += $userObj
   $ii++
}

$report